Shiny Lime Plaster Sealed with Olive Oil Soap
This is a how-to for a polished lime plaster, sealed with soap, not to be mistaken for Tadelakt (a lot of the same instructions apply to Moroccan Tadelakt). This is also similar to Venetian plaster, but without the marble dust. The use of cheap and commonly available materials is what makes this finish so great and its versatility makes it suitable for wet areas, backsplashes, showers, exterior walls and so forth, especially as a final plaster on your natural home. It is a good alternative to cement plaster as it has less embodied energy and absorbs carbon dioxide in the setting process. Lime is more permeable/breathable, more flexible and less prone to cracking.
Mixes:
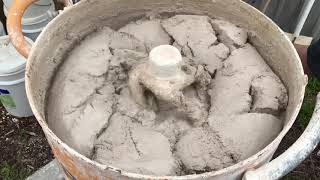
Base coat: 2-3 parts plaster sand, screened 1/8''-1/4'' to 1 part Type-S lime, and 1 part water or as needed.
Lime Putty: 1 part Type-S lime to 3/4 part water or as needed, use pigment for color (make sure you use a lime fast pigment).
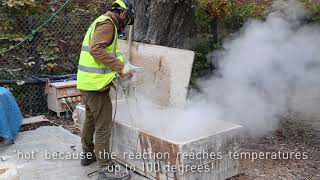
Soap: 1 part Olive oil soap to 20 part water. The soap chemically reacts with the lime plaster, forming lime calcium soaps. Calcium soaps are insoluble in water, and fairly hard. They are familiar in areas with calcium-rich ("hard") water, as deposits in bathtubs, sinks, and showers; when soap is mixed with the water's dissolved calcium carbonate/lime, calcium soaps form. 2 C17H35COO−Na+ + Ca2+ → (C17H35COO)2Ca + 2 Na+
The timing between coats is very important, as explained below.
Substrate/existing wall should be something lime bonds to, such as any unsealed lime or cement plasters, cement board, brick, clay or earth walls. Make sure it's well keyed, such as having a texture for the lime to grip to. Using concrete bonder can help bonding and decrease wicking, giving you more time work your base coat.
Applying:
Base Coat: is applied 1/4'' thick but can be applied in two passes. It shouldn't go any thicker than 1/2'' in total. Floating is optional, the main goal here is to leave a smooth, fresh base for the putty coat.
Putty Coat: this has to be applied when the base coat is firm but still wet, which varies a lot by weather and how much the substrate is wicking water from the base coat. Typically on a hot day, out of direct sun this would take 1-2 hours. If you apply concrete bonder to your existing substrate and cover your base coat well with plastic, you can extend this window over night. This is usually preferred because the slower the lime drys the stronger it will be. The lime putty needs to applied very thin so as not to crack, you can listen to the video for how it sounds when you're spreading it thin. It is also very important to keep your trowels very clean during this step, wiping it with a rag after, as extra build up on your trowel can lead to it sticking and could pull off your putty coat. Make sure to apply on an angle, because a flat trowel will stick to the putty coat.
Soap: This step is optional as the soap is to waterproof your plaster. This also needs to be done while you're putty layer is still wet, ideally as soon as possible but dry enough so that you don't smudge your surface and your polished, shiny luster which you work so hard at. A good way to test if you're ready to soap is to wet your finger and run across the surface without it smudging the finish. Your plaster may not dry evenly so should check multiple places.
After soaping I recommend washing the wall with water. You can apply any additional masonry sealers or wax.